Table of Contents
Overview – Ophthalmoscopy Technique
Ophthalmoscopy technique is a fundamental component of the neurological and eye examination, allowing direct visualisation of the retina, optic disc, and blood vessels. It can reveal critical signs of systemic diseases such as diabetes, hypertension, and intracranial pressure, and is often assessed in OSCEs. Mastery of this technique is essential for detecting early ophthalmic or neurological pathology. This guide outlines a step-by-step approach to performing ophthalmoscopy and recognising key normal and abnormal findings. For OSCE prep or real-world exams, this is a must-know skill.
Preparation & Positioning
- Explain the procedure and obtain consent.
- Ask the patient to sit upright and look straight ahead with both eyes open.
- Set the lens wheel to “0” on the ophthalmoscope.
- Use:
- Right hand and right eye for examining the patient’s right eye
- Left hand and left eye for the patient’s left eye
- Hold the ophthalmoscope close to your eye and stabilise it against your nose.
- Use your thumb to gently raise the upper eyelid.
Red Reflex
- Stand at arm’s length, shine the ophthalmoscope into the pupil and look for the red reflex:
- Uniform reddish-orange glow due to light reflected off choroidal vessels.
- Opacity in the red reflex suggests cataract, retinal detachment, or vitreous haemorrhage.
- Absent or asymmetric red reflex in children → possible retinoblastoma, congenital cataract, or other sight-threatening condition → urgent referral.

Visualising the Retina
- Approach the eye at a 15° angle from temporal to the pupil.
- Move in slowly, focus and locate a blood vessel.
- Follow the vessel centrally to locate the optic disc.
- Use dioptre wheel adjustments to bring the structures into focus depending on your and the patient’s refractive error.
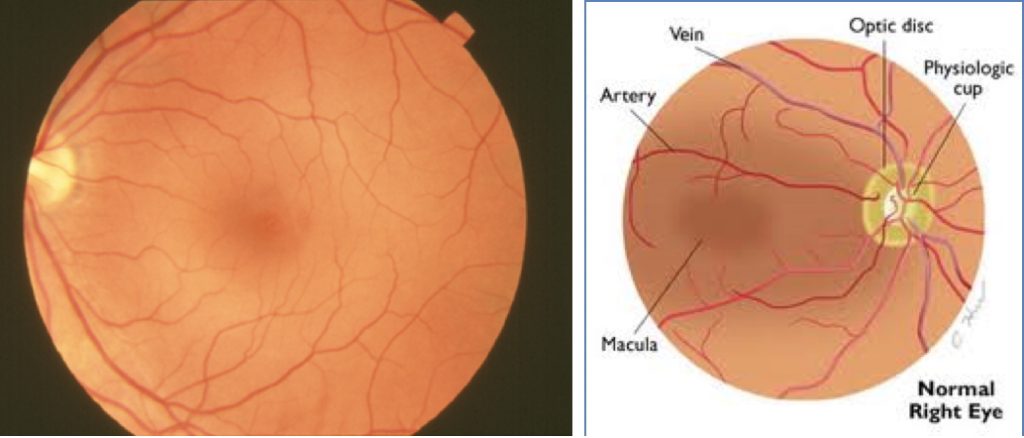
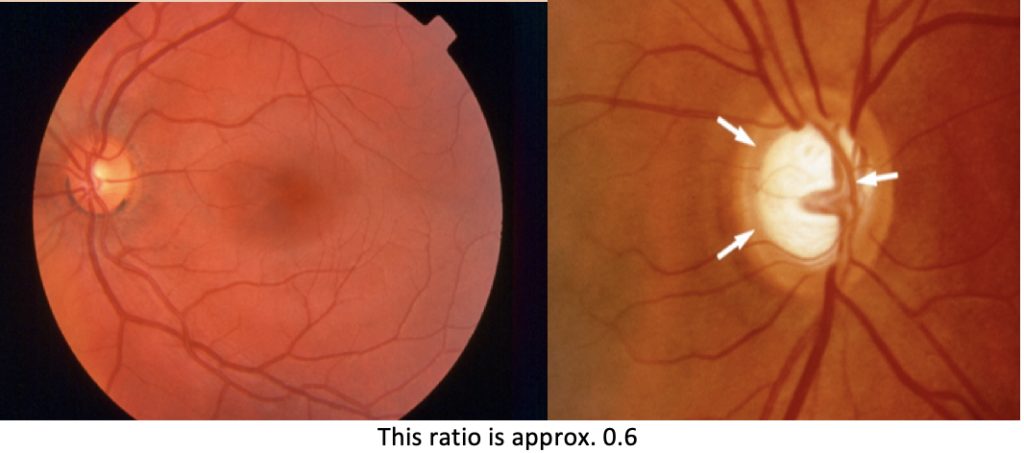
Optic Disc Assessment
- Colour: Normal = pink.
- Margins: Should be well-defined.
- Cup:Disc Ratio:
- Normal = < 0.5
- Increased ratio suggests glaucoma
- Look for cupping and disc pallor in optic atrophy
- Blurred margins suggest papilloedema
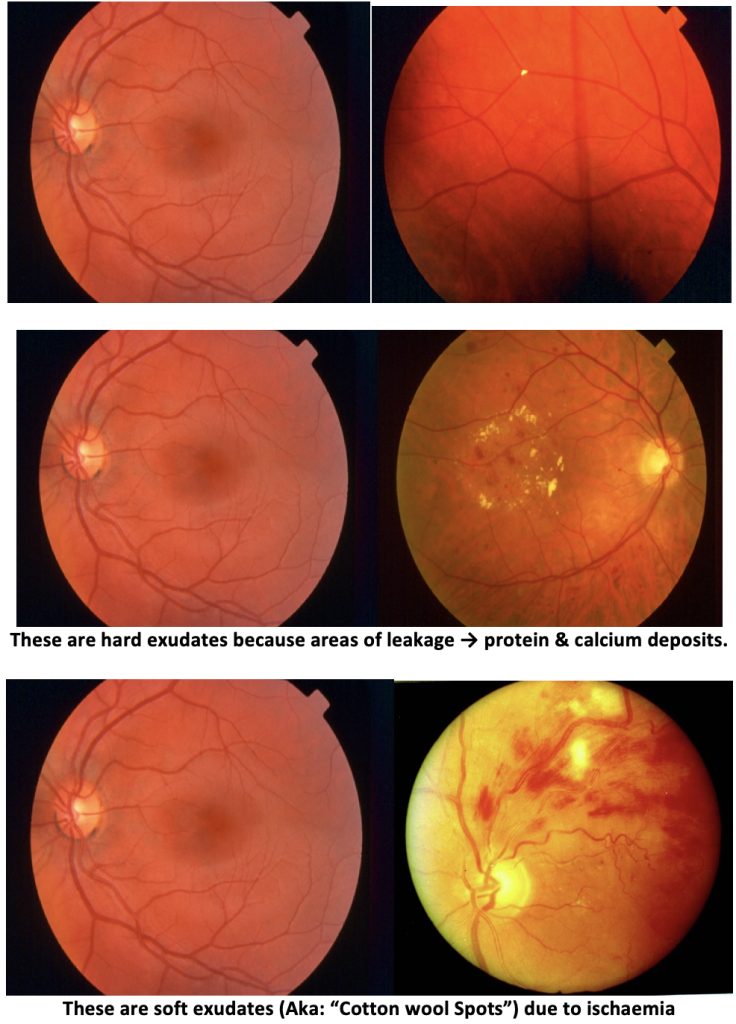
Retina Examination
Look for the following across the retinal field:
- Normal vessels:
- Arteries = thinner, lighter
- Veins = wider, darker
- Abnormal findings:
- Haemorrhages: Flame-shaped or blot
- Hard exudates: Yellow-white lipid deposits
- Cotton wool spots: Soft exudates → ischaemia
- Neovascularisation: Fragile new vessels = hallmark of proliferative diabetic retinopathy
- Associated conditions:
- Diabetic retinopathy (commonest in <60s)
- Hypertensive retinopathy
- Retinal artery or vein occlusion
Macula & Fovea
- Located temporal to the disc
- Appears darker than the surrounding retina due to pigment and ganglion cell density
- Fovea = central area, no overlying blood vessels
- Common pathology:
- Age-related macular degeneration (AMD)
- Leading cause of blindness >65
- Causes central vision loss but spares peripheral vision
- May see drusen or pigmentary changes
- Age-related macular degeneration (AMD)
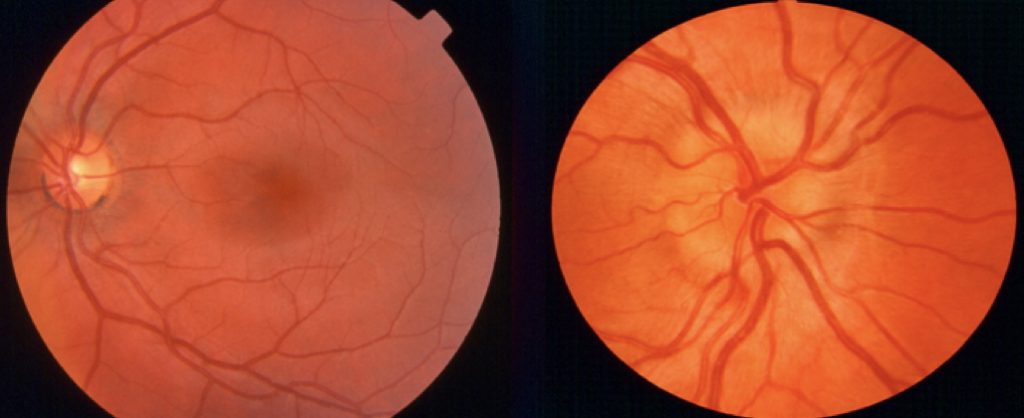
Normal Fundus
Optic Disc Abnormalities
(Left side = Normal; Right side = Abnormality)

Retinal Abnormalities
(Left side = Normal; Right side = Abnormality)
Blood Vessel Abnormalities
(Left side = Normal; Right side = Abnormality)
Proliferative diabetic retinopathy (Most common fundal abnormality that you’ll see)
These are dangerous because they are very fragile and can bleed very easily. → Impairs Vision

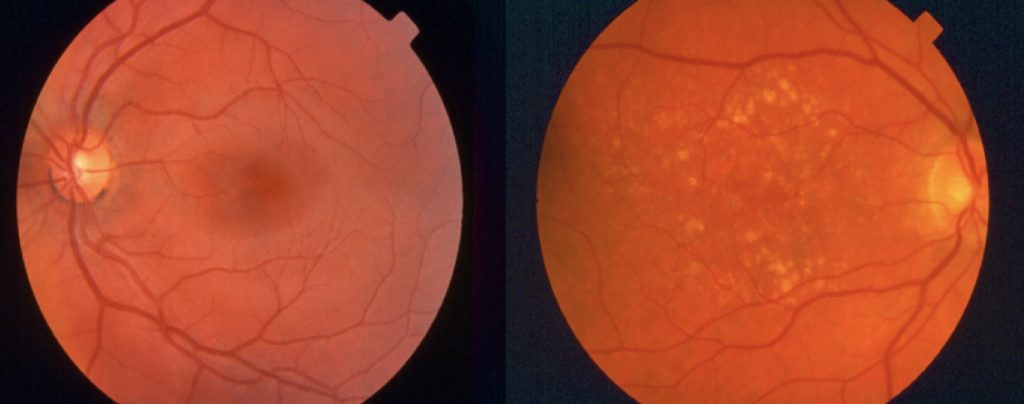
Macular Abnormalities
(Left side = Normal; Right side = Abnormality)
Summary – Ophthalmoscopy Technique
Ophthalmoscopy technique is a critical examination skill that allows assessment of the retina, optic disc, vessels, and macula. It can reveal diabetic retinopathy, glaucoma, papilloedema, and macular degeneration, among other pathologies. Always check the red reflex and perform a systematic fundal review. For a broader context, see our Clinical Skills Overview page.